Tips for Photographing Alaska Wildlife
The experience of capturing Alaska wildlife photos offers incredible rewards but also presents unique challenges. Alaska’s remote wilderness and unpredictable weather demand careful preparation. Success requires thoughtful planning, thorough scouting, persistence, and patience. Here are some tips to help you make the most of your Alaskan wildlife photography adventure.
Tip 1) Dress for the Weather
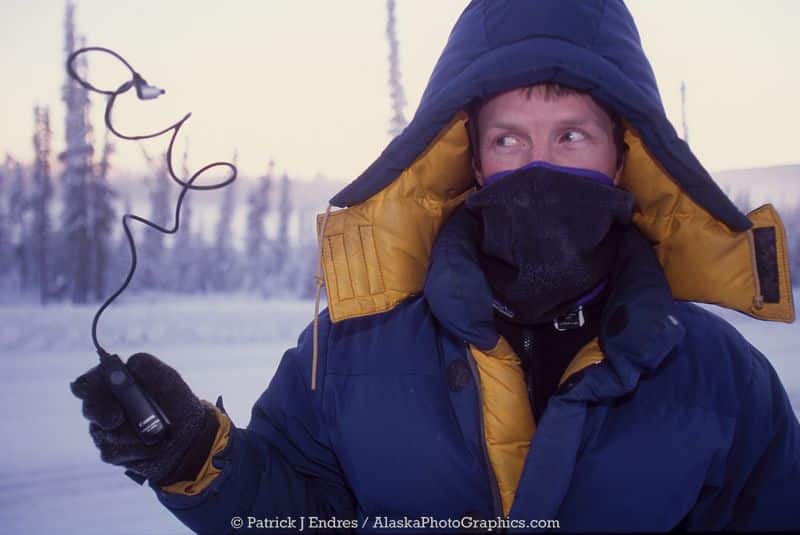
At minus 40 below zero, the remote plastic cord for my camera froze stiff, Fairbanks, Alaska.
Alaska’s weather is highly variable, so dress appropriately for the location, altitude, season and activity. In summer, pack for both warm to hot sunny days and cool mountain conditions, and, expect sudden weather changes. Important items include:
Spring-Summer-Autumn
- rain jacket and pants
- durable hiking pants and shorts
- down sweater, synthetic hoodie, or fleece
- lightweight wool socks
- lightweight windproof gloves
- lightweight wind-proof outer layer
- base layers like merino wool or polypropylene
- sun screen
- sun glasses
- mosquito repellent
Winter requires more substantial clothing and footwear including:
- well insulated down or synthetic parka
- insulated bib overalls or windproof snow pants
- thermal base layers (long underwear)
- medium to heavy socks
- lightweight glove liners
- medium to heavy weight gloves
- well insulated mittens
- face mask, neck gator, hat, headband
- well insulated boots & extra felt boot liners
- hand warmers and electric gloves/socks
See my article on cold weather photography. If you plan to photograph the aurora borealis, prepare for extreme cold and read my article on tips for photographing the northern lights.
Tip 2) Choose the Right Camera Gear
Photographing Alaska’s wildlife effectively begins with selecting the right gear for your subject—a task that can be one of the most challenging aspects of pre-trip planning. The distance to animals often varies, so I typically pack lenses ranging from 14mm to 500mm, along with one or two tripods. While one might consider a 14mm lens too wide for wildlife photography, I often find myself mixing up some landscape photography. When focusing on specific subjects, like grizzly or brown bears, I streamline my gear to reduce weight. However, extended stays—sometimes a week or more—often call for a versatile selection of focal lengths. For carrying equipment, I prefer the Kiboko camera bag by Gura Gear. Its minimalist design, lightweight build, and durability make it ideal and it will hold my 500mm lens. Pairing carbon fiber tripods with today’s lighter lenses also helps keep weight manageable.

Camera gear in Kiboko bag
Tip 3) Be Physically Prepared
Wildlife photography often involves hiking and trekking with a heavy pack. Build stamina before your trip by simulating these activities to avoid fatigue and maximize your opportunities in the field. Alaska has fewer trails than other states and you will often find yourself traveling across uneven terrain in search for wildlife. I often spend an entire day trekking, waiting, and watching light so bringing plenty of water and food for the day is essential.
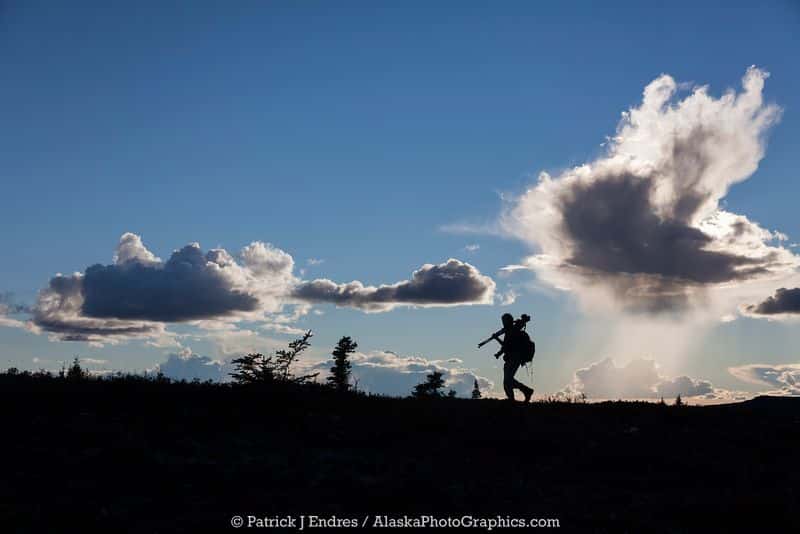
Photographer silhouetted against the sky in Denali National Park.
Tip 4) Research your Subject
Understand your subject’s habits, habitats, and behaviors. Animals are creatures of habit and frequent similar areas, however, it takes time to discern and anticipate their movements. The more you know about them, the better prepared you will be to capture photos in a natural setting. A small pair of binoculars is helpful to scout for wildlife. Some National Parks (like Denali National Park) publish guidelines on the required minimum distances to maintain from various animals. Brown bears, or grizzly bears, inhabit much of Alaska, and if you are camping or cooking, be informed on the protocol for food etiquette in bear country.

An inquisitive short-eared owl stares intently while standing on the surface of Alaska’s arctic north slope. (Patrick J. Endres / AlaskaPhotoGraphics.com)
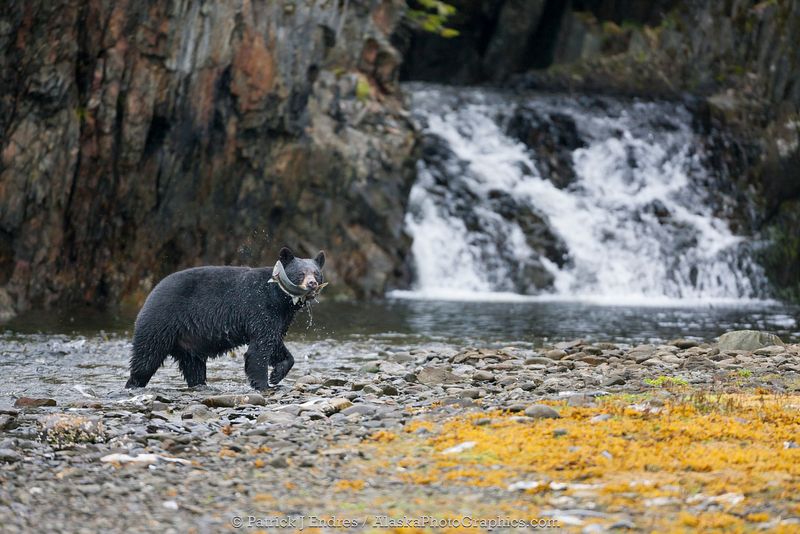
Black bear fishes for pink salmon in a stream along western Prince William Sound, Chugach National Forest, Kenai Peninsula, southcentral, Alaska. (Patrick J. Endres / AlaskaPhotoGraphics.com)
Tip 5) Master the Light
Scout locations in advance to learn how sunlight falls at different times of day. Have some idea of where the sun will rise and set, since this will inform your “golden hour” photo locations. You will often be in mountainous country, and the surrounding hills dictate available light, especially when at low angles. Mountain weather is often cloudy and the luxury of predicting light can be challenging. Alaska’s low-angle sunlight creates dramatic effects, especially during the golden hour, but conditions can change quickly. Knowing and anticipating the light’s direction enhances both wildlife and landscape shots.

Brown bear walks along the shores of Naknek lake just before sunrise in Katmai National Park, Alaska. (© Patrick J. Endres / AlaskaPhotoGraphics.com)

Brown bear wades in the Brooks River, sunrise over the Brooks River and Naknek Lake, Katmai National Park, Alaska. (© Patrick J. Endres / AlaskaPhotoGraphics.com)
Tip 6) Use a Tripod Wisely
Tripods improve stability and tracking for long-lens shots. Invest in quality options like those from Really Right Stuff, Kirk Enterprises, Gitzo, and Bogen. While essential for certain situations, don’t over-rely on them; handheld techniques often work well for capturing sharp images with practice. I shoot my 500mm image stabilized lens handheld all the time, and the images are impeccably sharp. It is possible with a little technique.

One of my favorite mini tripods when I need to travel light in the backcountry. Yes, I use my big glass, sometimes the 500mm, on this little tripod. It is not conventional wisdom in the photo world, but it works great for me.
7) Experiment with Perspective
Capture unique, natural-looking compositions by adjusting your shooting angle. Get low for an eye-level view, climb for a top-down perspective, or incorporate the surrounding environment to add context to your images.

An Arctic fox in a white winter coat rests in a snowdrift along a lake in Alaska’s Arctic North Slope. I laid down and put my camera and lens on the snow to get this low-angle view. (© Patrick J. Endres / AlaskaPhotoGraphics.com)

Red salmon or “sockeye” in the spawning phase (red body and green head) in a small stream in the Alaska mountains. By patiently wading in shallow water I held my camera underwater in a housing to capture this over/under perspective. It took many trial shots! (© Patrick J. Endres / AlaskaPhotoGraphics.com)
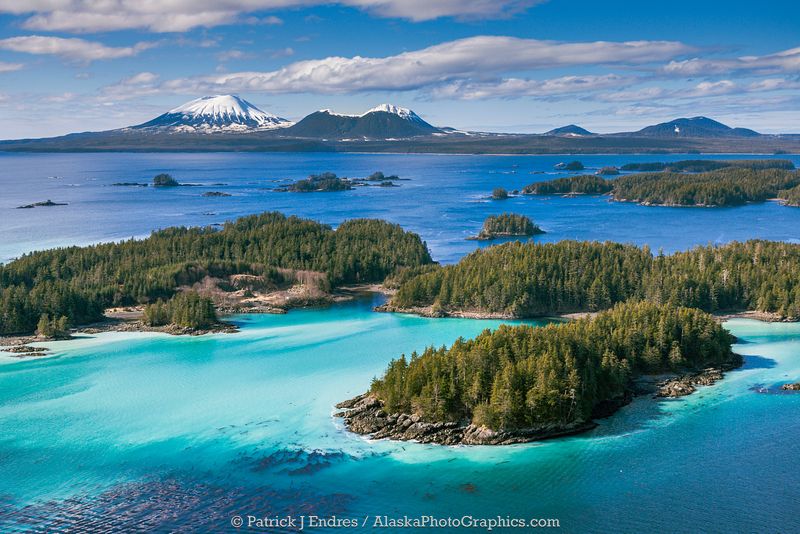
Islands in Sitka Sound, water infused with Herring spawn resulting in aqua blue colored water, inactive volcano Mt. Edgecumbe on the horizon, Southeast, Alaska. Aerial perspectives give a broad view of the landscape.
Tip 8) Avoid Tunnel Vision
Using telephoto lenses can lead to repetitive, centered compositions, especially when tracking moving wildlife. Take time to evaluate the scene and experiment with framing. Anticipate movement and include the surrounding environment to tell a more dynamic story. If possible, occasionally examine the full-frame area of your image. Compose thoughtfully, don’t just target shoot.

Bull muskox on the snow-covered tundra of the arctic north slope, Alaska. (© Patrick J. Endres / AlaskaPhotoGraphics.com)

Bull caribou, rangifer tarandus, prances across the tundra north of the Brooks Range, Arctic, Alaska. (© Patrick J. Endres / AlaskaPhotoGraphics.com)
Tip 9) Work Efficiently
Be ready to adapt quickly to changing conditions. Know your camera settings and keep essential gear like digital media or batteries accessible. Practice with your camera so you are fast and efficient with its use. Having a second camera body accessible or a different lens on a waist belt can help you capture unexpected close encounters if a different focal length is needed.
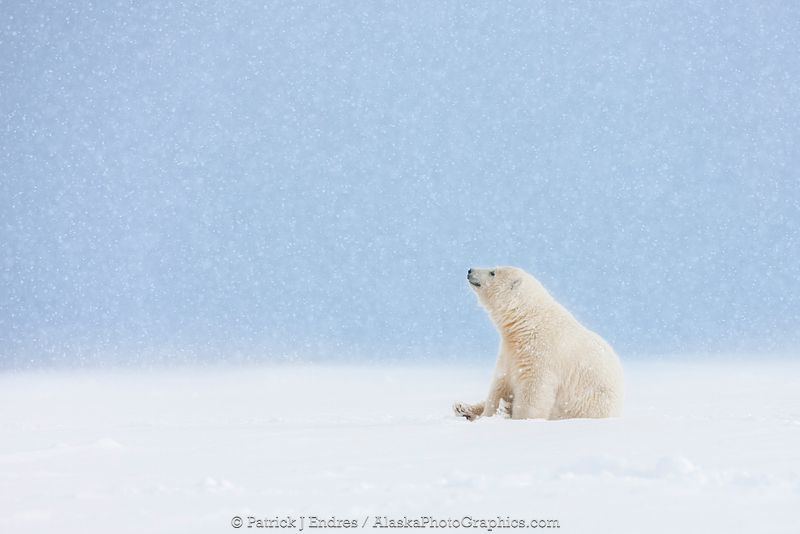
Polar bear cub of the year sits in the snow watching snowflakes fall, Arctic, Alaska. (© Patrick J. Endres / AlaskaPhotoGraphics.com)
Tip 10) Embrace Variety
While close-up wildlife portraits are impactful, consider wider focal length lenses to showcase animals within their environment. Think about being a visual story teller to highlight the relationship between the animal and Alaska’s vast landscapes.

Western arctic caribou herd migrates in the Utukok uplands, National Petroleum Reserve Alaska, Arctic, Alaska. (© Patrick J. Endres / AlaskaPhotoGraphics.com)

Female grizzly bear basks in the morning sun near a small tundra pond in Denali National Park, Alaska, with a snow-covered Alaska mountain range in the distance. (© Patrick J. Endres / AlaskaPhotoGraphics.com)
Tip 11) Be Patient and Persistent
Strive to balance your enjoyment of nature with the persistence and patience required to capture the perfect shot. Wildlife photography frequently involves long periods of waiting—whether for the subject, the right lighting, or favorable weather. Embrace the downtime by resting, observing your surroundings, reviewing your camera manual, or simply exploring the area. Patience is key, so make the most of every moment in the field.
Tip 12) Be Weather-Wise
Dramatic weather often yields opportunity for extraordinary photos. Inclement weather, like snowstorms, fog, rain, etc., can add mood to your images—just ensure you’re dressed appropriately for the conditions.

Cow moose in a winter snowstorm. Denali National Park, Alaska. (© Patrick J. Endres / AlaskaPhotoGraphics.com)

Common loon in a rain storm, Long Lake, Matanuska Valley, Alaska. (© Patrick J. Endres / AlaskaPhotoGraphics.com)

Coastal brown bear in the orange morning sunrise on beach of Naknek Lake in Katmai National Park, Alaska. (© Patrick J. Endres / AlaskaPhotoGraphics.com)
Tip 13) Adjust your Schedule
The light never ends when shooting during Alaska’s summers and golden hour is a very late and very early. Be prepared to shift your sleep schedule to take advantage of the best light conditions. In the high Arctic, I’ve had to switch my sleep schedule from 10 pm to 5 am. Know the time of sunrise and sunset for your location, it varies considerably.

5:30 am August sunrise at a high alpine tundra campsite in Gates of the Arctic National park, Alaska. (© Patrick J. Endres / AlaskaPhotoGraphics.com)

12:30 am, midnight sun along the Nigu river, Brooks range, arctic, National Petroleum Reserve, Alaska. (© Patrick J. Endres / AlaskaPhotoGraphics.com)
In summary, photographing Alaska wildlife is exciting, at times boring, challenging, fascinating, and fun. You might not always come away with award-winning photos, but you will deepen your connection with the land and the wildlife. Plan thoroughly, stay persistent, and enjoy the adventure of photographing Alaska’s wildlife.
Hello and I must say nice site!!! I am coming to Alaska in a week and I realize now that I should have looked a little sooner for hot spots. I am coming with my girlfriends family and I am bringing Canon digital equipt. to shoot with. I was wondering because we are going to Denali area, where and what to see. I am not the tourist-guide kind of person. I was raised in Washington state but now live in Florida. I have children here or else I would have traveled to and probably stayed in Alaska. If you have a quick minute to give me some advice, if not I understand. I envy you and your opportunities as a photographer. I spoke with Art Wolfe once and should have persued his advice , but again my kids have come first. I look forward to reading more of your advice and will be amazed I’m sure at the realness that pictures cannot capture, when I am there. Best regards, Jim Johnson
James, I’m just back in america after some travels so it may be a little late, but in a very general way of advice:
The park entrance area is usually good for moose. Mile 38 to mile 65 or so is good for bears. And the wonder lake area at the end of the park is great for landscapes. And of course, lots in between. Good luck.
Thanks…..its a very helpful tips…
I learnt the basic photography rules from Mr. Kishore Mamillapalli who is one of the leading wildlife photographers from South Africa. He used to say that “Beauty truly is in the eye of the beholder”. If you like what you see on your camera screen, or through the viewfinder, you will like the photograph.
There are some basic photography rules for composition. Once you know these rules, you can use them, ignore them, or break them. Follow your gut, and you will end up with spectacular, sometimes breathtaking results. Kishore is really an astonishing wild life photographer and has a great eye for details..
Fantastic site, most impressive!!! I’m heading to alaska for the first time in a onth, i’ll try to reach you via phone…
Thks don
i’ve been reading and enjoying your articles in conjunction to a trip i’m taking to kenai peninsula next week. this is going to be my third visit to kenai peninsula. i picked up digital photography a couple of years ago (still learning enthusiastically) and i’m bringing my gear this time and hoping to get lucky while on excursions. i’m heading out for a bear watching trip on wednesday, i believe big river lake…we are going to fly over from soldotna and then we are going to be on a boat watching the bears. i know it’s not ideal but that’s the best i could do considering circumstances.
i’m bringing two bodies: 5d ii (just added it for this trip), 7d, 16-35mm, 24-70mm, 50mm, 70-200mm and 1.4x. i wanted to ask if you could advise on how to put the two bodies in good use with two different lenses.
Matt,
Basically, it depends on your situation and circumstances. Having two bodies is an excellent idea and allows you to make use of easily acquired variations of a scene. As far as what lens you have on depends on the situation. If you are shooting bears, the 70-200 w/1.4 and the 24-70 seem like a good start. You can shoot tight, or wider if necessary. Good luck.
thank you so much…i am very excited:-)
I am going to Alaska in July 2013. i need some more tips about photography.
I am going to Alaska in July 2013.
Some useful info, many thanks.
feeling like a school girl waiting for my phone to ring 😉 wink!
fantastic images
This pictures are amazing, and provided tips will come in handy elsewhere too. I hope that I will have the opportunity someday to visit this beautiful country. TY
I’d like to ask your advice. I’m going to be in Alaska for about 3 weeks in June/July and will be renting a motorhome to see and photograph the great outdoors. Would you recommend some places to go, (for pics) and would you advise a camera backpack as opposed to a typical backpack. I’m in excellent physical shape and can handle the hiking. I’m going to begin in Denali NP and end up on Kodiak Island before my flight home. Going to put in some white water rafting as well. Thanks for the website and seeing Alaska through your glass.
David
Hi Patrick! Your photos are gorgeous! Thanks for the tips; I’m sure they’ll prove to be most helpful! I actually stumbled upon this site while trying to decide whether to purchase the Nikon Coolpix 900 with 2000mm zoom or the Panasonic Lumina FZ300 with 600mm zoom for wildlife shots in Alaska. (I already have a Canon DSLR with an all-in-one 16-300 lens). The Lumina seems to be the better camera, but the Coolpix’s 2000mm zoom is….wow! Do you have an opinion?
Hi Lauren,
I’m currently traveling overseas. Regarding the camera question, I’m not familiar with those cameras but I would go for overall image quality over focal length. 2000mm is a tough range to work with, keep the camera steady, and avoid other issues. 600mm should be sufficient for most situations. Good luck Patrick
Sent from mobile
Patrick Endres
Fairbanks, Alaska
http://PatrickEndres.com
http://AlaskaPhotoGraphics.com