Cold Weather Photography
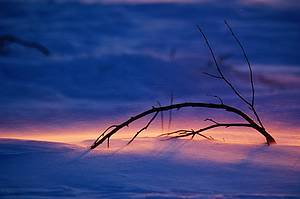
Pink sunset backlights blowing snow on the tundra. © Patrick J. Endres
To best prepare yourself for cold weather photography, it is imperative to establish a system that works both for you and your camera equipment. You need a method that keeps you warm enough to function and enjoy the experience. While I like being in the cold, I do not like being cold. There is a big difference here. Like most things in life, we feel most comfortable and confident once we have personally tested ourselves in a given situation or set of conditions. This applies to working in the cold as well.
Alaska’s winter has a rare beauty in the quality of light and color and its silence and simplicity. But the cold temperatures can be extreme, particularly in the interior and arctic regions. Here are a few tips to help you if you plan to venture out to photograph in the cold.
Ways to stay warm
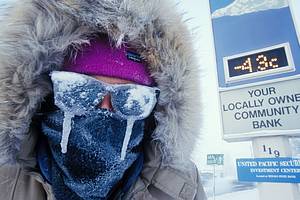
Sometimes you can convince your friends to do crazy things for a photo. I used a spray bottle of water to make the icicles on these sunglasses. They were not on his face at the time, however. © Patrick J. Endres
There are two basic ways we stay warm. One is to generate heat within through exertion and then retain that heat with clothing, or we can absorb the heat from another source like a wood stove, chemical hand warmers, or drinking hot fluids.
Sometimes, putting on more insulation or clothing does not help, and additional heat is needed. A combination of both works best for me. I should first state that by comparison with my other hominid friends and colleagues, I seem very susceptible to cold hands and feet.
Over the years, it seems as if I’ve tried just about everything in an attempt to stay warm. I have found no magic solution. However, my constantly tweaked system appears to work o.k., if implemented well.
I’ll discuss how I dress and deal with photography in cold weather. By the way, this is about the human body, not the camera gear. I’ve found, so far, that the weak link is me, not my cameras and gear (save that having extra batteries).
General Clothing
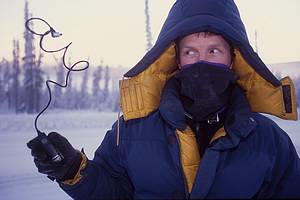
I favor thick-down parkas for the chilly winter conditions. Note that the electronic shutter release, usually soft in warm temperatures, is rigid at 40 below zero. © Hugh Rose
I seldom expend great exertion when photographing amidst Alaska’s super cold sub-zero temperatures. Generally, I’m standing around waiting for the aurora borealis or for the proper light to fall upon a landscape. I break ranks with the conventional wisdom of clothing layering in these conditions. Layering IS very critical when your body temperature varies considerably due to heat generation through exercise, and you need to adjust with clothing by adding or removing layers.
As for the deep cold, you want loft and insulation when you are not exerting yourself. This is best achieved with down, like a big down parka, although some synthetics work well also. I start with a base layer of wool (merino wool—soft on the skin, or capeline). Not cotton! Then over that goes a mid-weight shirt of similar fabric, one with a collar reach to cover the neck, then a down sweater, then my hooded down parka. This does the trick nicely, and my body core stays warm even at frigid temps. I use similar base layers for the legs with an outer layer appropriate for the conditions. Generally, that is a pair of insulated bib overalls. Avoid anything “tight” fitting.
Hat and Face Mask
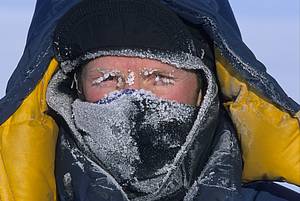
I paused for a break after my camera and I quit working at 40 below while photographing muskoxen on Alaska/s arctic north slope. A face mask is a better option than this neck muffler due to condensation and frost from breathing. © Patrick J. Endres
As for a hat, I’ve found nothing that can compare with my beaver hat for warmth. Although, if the parka has a well-insulated hood, a smaller, less bulky hat made of wool or fleece will suffice.
I usually use a face mask or neck muffler as well. A neck muffler can be pulled up over the face when necessary. I have one made out of Moreno wool, which is soft, comfortable, and warm.
However, condensation from your breath will freeze during extended periods covering the mouth and nose. As an alternative, I sometimes use a facemask with breathing holes for the mouth and a nose protection guard. It is soft, lightweight, and dries easily and quickly (unlike heavy neoprene). It collects less condensation and frost.
Footwear
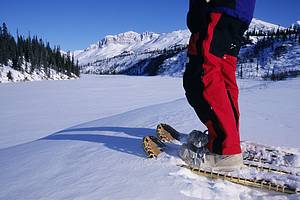
Bunny boots are a tried and true, although heavy, warm winter boot choice. © Patrick J. Endres
Most boots are over-rated in their estimated warmth factor; don’t make your judgment on that statistic alone. When choosing a boot, here are a few things to consider. A tight fit is terrible, period! Get a boot with room to wiggle your toes easily, even with a thick pair of socks. (Remember, this is not performance footwear for running and hiking, primarily for low activity, cold conditions). You also want a boot that has a well-insulated sole. It is sometimes helpful to buy a boot that is a little large, so you can insert felt insoles on the bottom to increase sole insulation.
The body of the boot needs to have sufficient insulation as well. The old military issue “Bunny boots” are well-loved in Alaska; although ugly and heavy, they are remarkably warm. I have used a pair since the day I arrived. I also have a pair of mukluks made out of moose hide with heavy felt liners and insoles. They are light and comfortable but not good enough for me in 40 below zero. Boots with a removable felt or foam liner make it easy to dry the liner at the end of the day, which is essential.
Gloves and Mittens
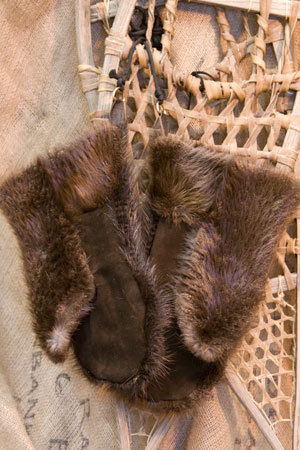
Beaver mitts have proved the best route for me in freezing weather. They are large enough to fit a glove inside and have a soft enough leather pad to let me operate my camera without removing them when necessary. © Patrick J. Endres
This is the most challenging part of my body to keep warm. Light insulation is needed for finger dexterity, hands often held above the heart, and touching cold metal frequently makes this so.
There are ways to deal with this, and here is my imperfect but functional system. I start with a thin pair of loose-fitting wool gloves. If they fit tight, they freeze my fingers.
Loose is the key for me. I also have a pair of medium-weight gloves made of fleece, and I use these when it is minus 10 degrees or colder. Both gloves go inside large mittens made of beaver fur with a supple leather hand pad.
Inside the beaver mitts is a chemical hand warmer that keeps the mitts toasty warm. I can operate my camera with the beaver mitts due to the supple leather pad and canon’s excellent exposure wheel on the back of the camera, which is an easy dial to operate.
If I need to remove my hands for extra dexterity, I do so for a short time and then insert them back in the mitts to warm up.
Despite this, my hands sometimes get cold, and then I resort to the mountaineer’s trick of swinging the arms back and forth (never exceeding the heart level) for about 5 minutes until warm blood is forced into the hands by centrifugal force. It takes a while, but it works. I’m then ready to go for a bit again.
A brief note about the equipment
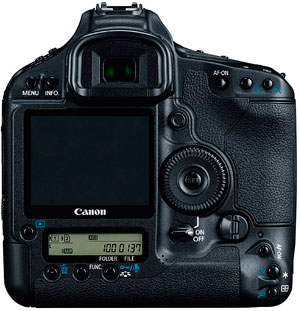
The wheel on the back of the Canon cameras is a perfect design element for operating the camera with mitts or gloves. It is easy to turn with the thumb or finger and thereby control exposure settings.
Regarding equipment, I’m amazed at the heartiness of my Canon 1D and 5D series cameras. While the LCD screen slows, it still functions at minus 30 and 40-degree temperatures.
The batteries last a much shorter, but keeping a spare one inside my down parka pocket and trading them out works well.
The San Disk extreme cards have performed without problem in cold temperatures. Sometimes, if I knew I could be waiting a long time for a subject. I’ll leave the camera on the tripod but remove the battery and flash card and put it in my parka pocket to stay warm.
After frostbiting my face a few times by pressing the metal angle bracket on my camera up against my face, I now add moleskin padding to the camera parts that inevitably touch my face and nose.
This article is written by Professional Photographer Patrick J. Endres
